The Physics of Painting a Striped Ceiling
Painting a striped ceiling can reshape a room's proportions. Learn how light, contrast, and stripe direction transform height, width, and style.
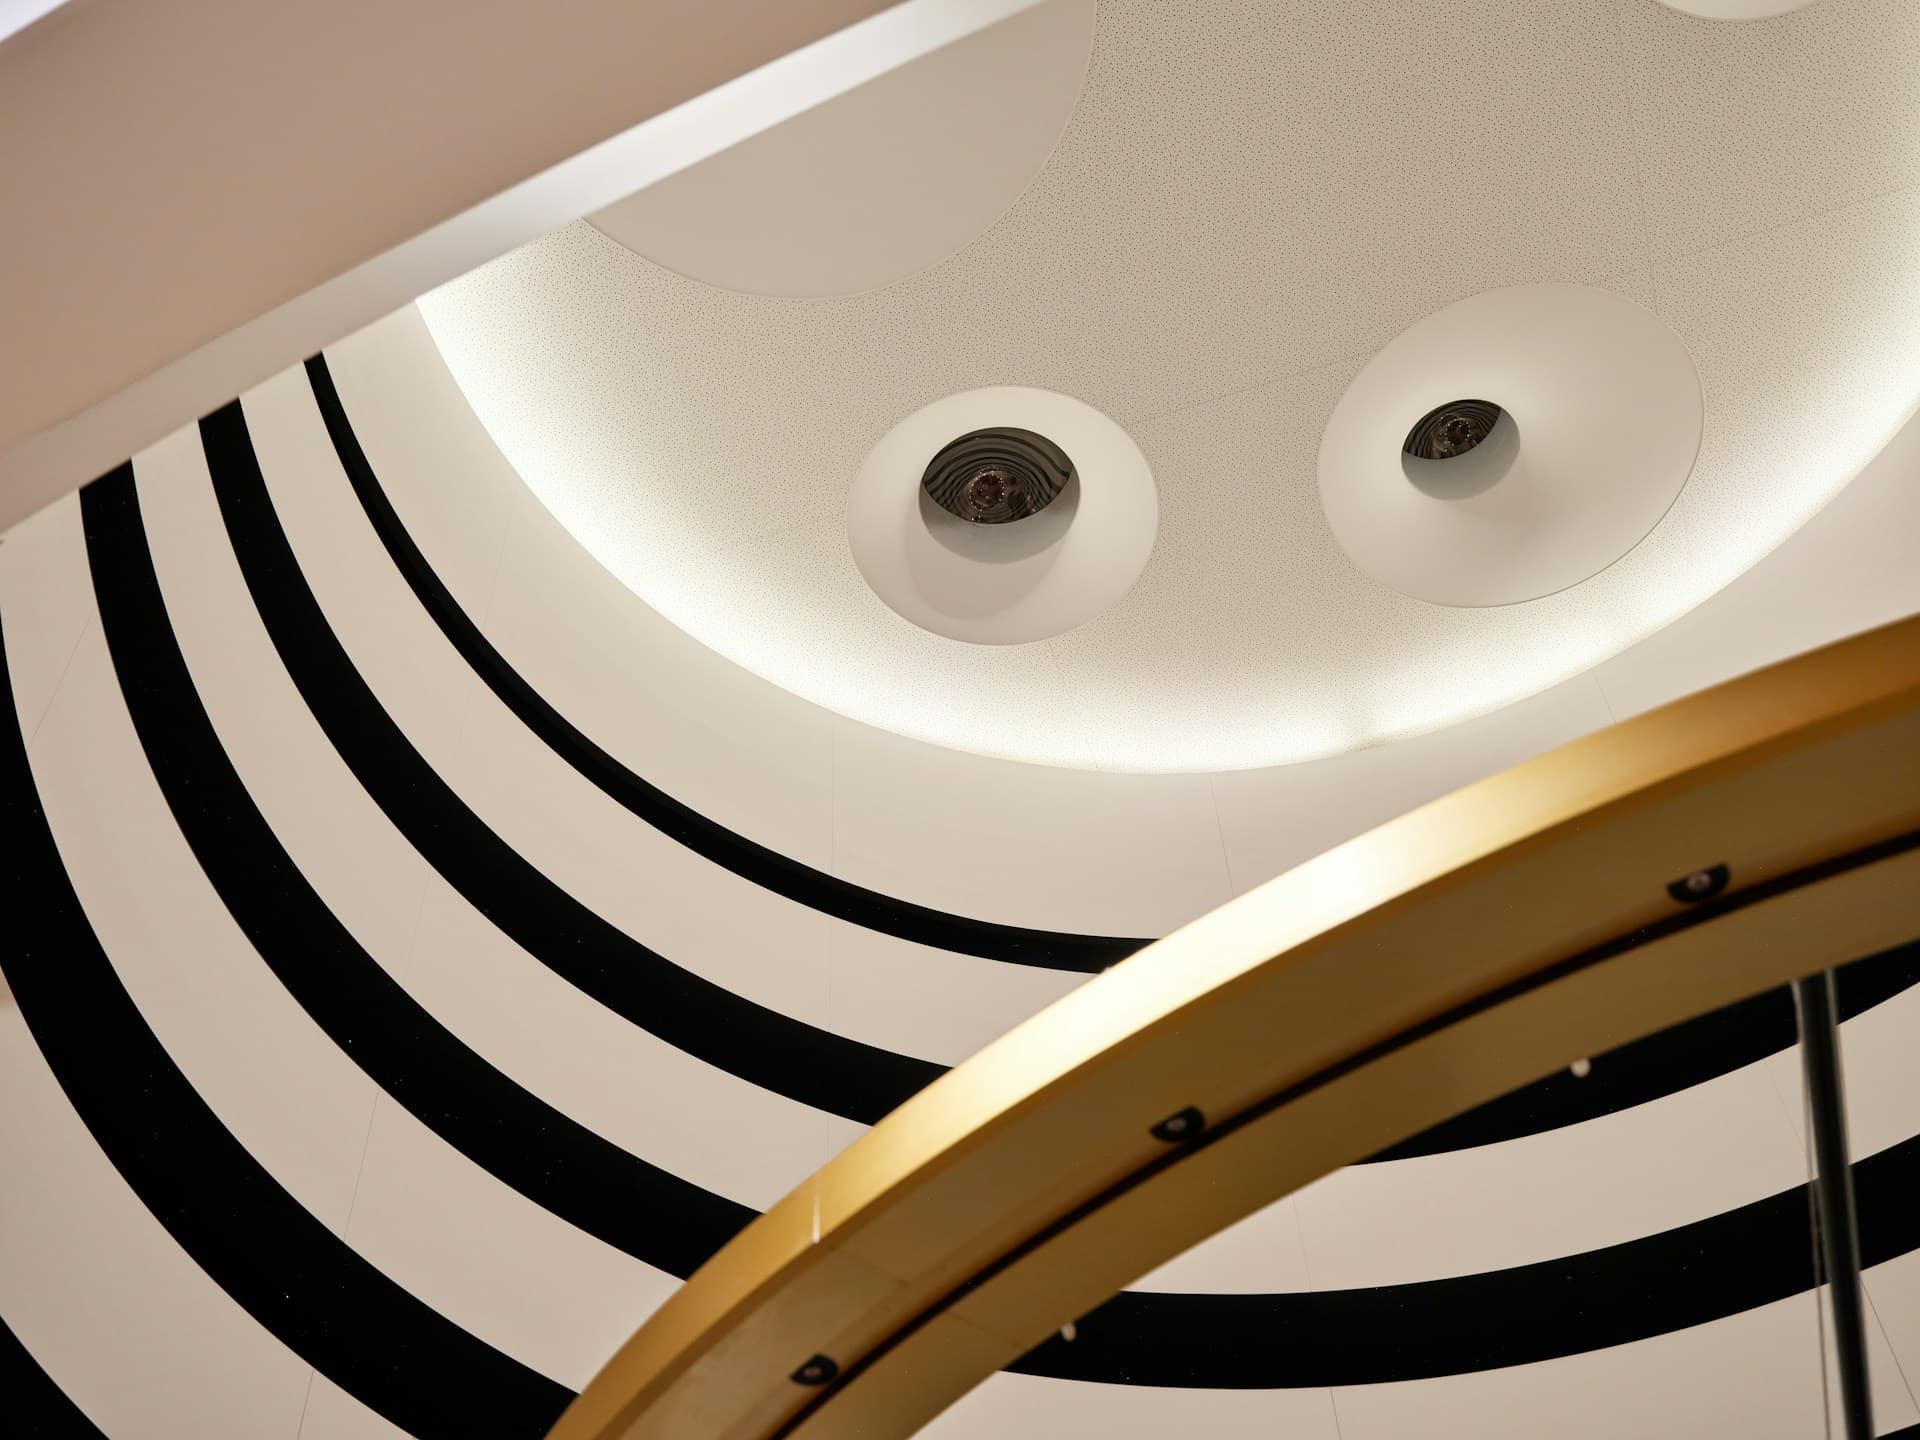
Look up for a moment. When was the last time you gave your ceiling more than a passing glance?
Most homeowners invest hours choosing wall colors, flooring, furniture, and decor, yet the “fifth wall” is often left plain white. But what if a few carefully painted stripes could make your room feel taller, wider, brighter, or more luxurious?
That’s the power of striped ceilings.
A striped ceiling isn’t just a trendy accent—it’s a smart optical tool. By understanding how light, perspective, contrast, and patterns interact, you can dramatically shift how a space feels without moving a single wall.
In this guide, we’ll break down the science, share best practices, highlight mistakes to avoid, and provide step-by-step instructions for professional-looking results.
Why a Striped Ceiling Works
Our brains constantly process visual cues to judge size, distance, and proportion. Strategic lines and patterns influence these perceptions in powerful ways. A well-designed striped ceiling can:
- Make a room appear taller
- Create the illusion of added width
- Draw the eye to architectural features
- Add depth to flat, plain spaces
- Inject personality without overwhelming the room
The Physics of Visual Perception
Painting may be artistic, but the impact on a room is rooted in physics and how our eyes and brains interpret visual information.
1. Directional Lines Guide the Eye
The human eye naturally follows straight lines. Stripes create movement and direction, influencing whether a room feels longer, wider, taller, or more balanced.

2. Contrast Affects Depth
Light colors reflect more light and appear closer or more open. Darker colors absorb light and create depth. Alternating stripes exaggerate this contrast for added dimension.
3. Light Reflection Changes the Mood
Different paint finishes reflect light uniquely. Here’s a quick comparison:
| Paint Finish | Light Reflection | Best For |
|---|---|---|
| Flat / Matte | Minimal reflection | Hiding imperfections, soft transitions |
| Eggshell | Slight sheen | Subtle reflection, occasional cleaning |
| Satin | Higher reflection | Flawless ceilings, highlighting details |
Choosing the Right Stripe Direction
- Horizontal Stripes: Excellent for narrow rooms or hallways—they visually widen the space.
- Stripes Across the Shorter Dimension: Help make longer rooms feel more expansive.
- Diagonal Stripes: Add energy and dynamism; best used sparingly in creative spaces or playrooms.
Selecting Colors and Stripe Width
Popular Color Pairs
- White + soft gray
- Cream + beige
- Navy + white
- Sage green + ivory
- Taupe + warm white
Stripe Width Guidelines
- Narrow: Elegant and traditional (formal rooms)
- Medium: Versatile and timeless (most living spaces)
- Wide: Bold and modern (larger rooms with high ceilings)
Tools You’ll Need
- Quality ceiling paint
- Premium painter’s tape (for crisp lines)
- Measuring tape
- Laser level or chalk line
- Paint roller + angled brush
- Drop cloths and sturdy ladder
How to Paint a Striped Ceiling (Step-by-Step)
- Prepare the Surface — Clean thoroughly and repair any cracks or holes.
- Apply Base Color — Paint the entire ceiling your lighter shade and let it dry fully.
- Measure & Mark — Use a tape measure and laser level/chalk line for perfectly straight, even stripes.
- Tape Carefully — Press tape edges firmly to prevent bleed.
- Paint the Stripes — Apply two thin coats with a small roller for even coverage.
- Remove Tape — Pull away while the final coat is still slightly damp for the cleanest edges.
Pro Tip: Patience during measuring and taping makes the biggest difference in the final result.
Common Mistakes to Avoid
- Uneven measurements or crooked lines
- Low-quality tape that allows bleed
- Skipping surface prep
- Too much contrast in small rooms
- Painting over wet coats
- Using glossy paint on imperfect ceilings
- Ignoring the room’s natural light sources
Final Thoughts
Painting a striped ceiling is more than decoration—it’s an exercise in visual perception. With an understanding of lines, light, contrast, and color, you can transform how a room feels without structural changes.
Whether you want to make a compact space feel larger, add sophistication, or create a unique focal point, striped ceilings deliver high impact for relatively low effort and cost. With careful planning, even a beginner can achieve stunning, professional results.
The next time you look up, remember: your ceiling isn’t just overhead—it’s a blank canvas for the subtle science of design.
Frequently Asked Questions
Do striped ceilings make a room look bigger?
Yes. Proper direction and subtle contrast can create illusions of greater width, length, or height.
What colors work best?
Soft, complementary pairs like white/gray, cream/beige, or sage/ivory deliver elegant results. Bold contrasts make stronger statements.
Matte or glossy for ceiling stripes?
Matte or flat finishes are usually ideal—they minimize glare and hide minor imperfections.
How wide should the stripes be?
Medium widths suit most rooms. Narrow for traditional elegance; wider for bold drama in larger spaces.
Can I do this in a small room?
Absolutely. Lighter colors and lower contrast keep small rooms feeling open and airy.
Is it difficult for DIYers?
It’s very achievable with good prep, quality tape, accurate measuring, and patience.
Will striped ceilings go out of style?
Timeless color combinations and balanced proportions remain popular for years.
Related Posts
More in Home Decor →
Cozy Corners for Small Apartments: Budget Style Guide
Tiny apartment feeling cramped? Create cozy corners with clever storage, mood lighting, and budget decor that turn a small space into a warm, stylish retreat.
Neo Deco Home Decor: Budget-Friendly 2026 Art Deco Trends
Obsessed with glamorous Neo Deco? Here’s how to bring 2026’s Art Deco revival into your home on a real budget—no designer price tag required.
Living Room Wall Decor Ideas for Blank Walls
Walk into your living room and ask yourself one question: Does it feel finished? Discover 12 practical living room wall decor ideas that work in every style.